


The Sims community has a long history of creating, sharing, and using mods to tweak and tune gameplay. They can be used to change just about anything in-game, from changing the appearance of loading screens to adding new careers or aspirations and more. While some mods add vast amounts of new content, others make smaller changes like making wild rabbits immortal or mixing up what can be served on drinks trays.
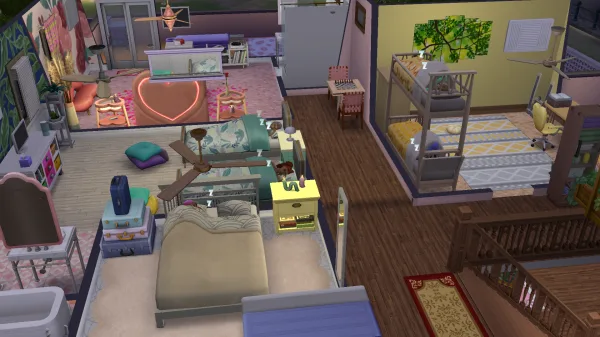
Custom content and mods are functionally slightly different in The Sims 4. Custom content tends to refer to cosmetic items, like new Build/Buy Mode or Create-a-Sim items. This gives you the flexibility to make your Sims look exactly the way you want them to, without being limited by what’s available through official DLC. Despite having different purposes, you’ll add them to the game in pretty much the same way.
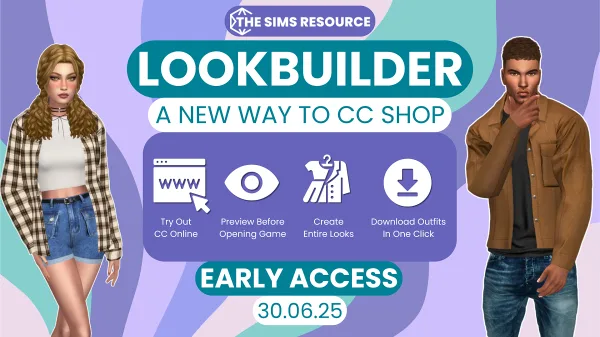
There’s pretty much a mod available for anything you could think of. The Sims Resource is home to thousands of mods and even more custom content ready for you to load into your game to mix up your next Legacy Challenge (or to fix a problem). Once you’ve found and installed your mod(s) of choice, you’ll need to know which folders to navigate to on your computer to add them to The Sims.
Unfortunately, you can only use mods if you play on PC or Mac. Hopefully, modding functionality will be added to console versions of the game at some point.
How to add mods and custom content on PC

Your mods and custom content need to be put into a specific file to make them work. The way you add them to this folder is slightly different depending on whether they’re in a Zip file or not.
How to extract mods and custom content from Zip files
If your content downloaded as a .Zip file, you’ll need to extract it. You can check if the file is Zipped by looking at the file extension.
Right-click the mod and select properties. This opens up a new window which gives some information about the file, such as the size and download date. Under the name, it’ll tell you which file type it is. If it says .Zip archive, you’ll need to extract this into your mods folder.
Right-click the folder again and select Extract Files. Next, paste this into the box that says Destination Path and click OK:
C:\Users\[Your Username]\Documents\Electronic Arts\The Sims 4\Mods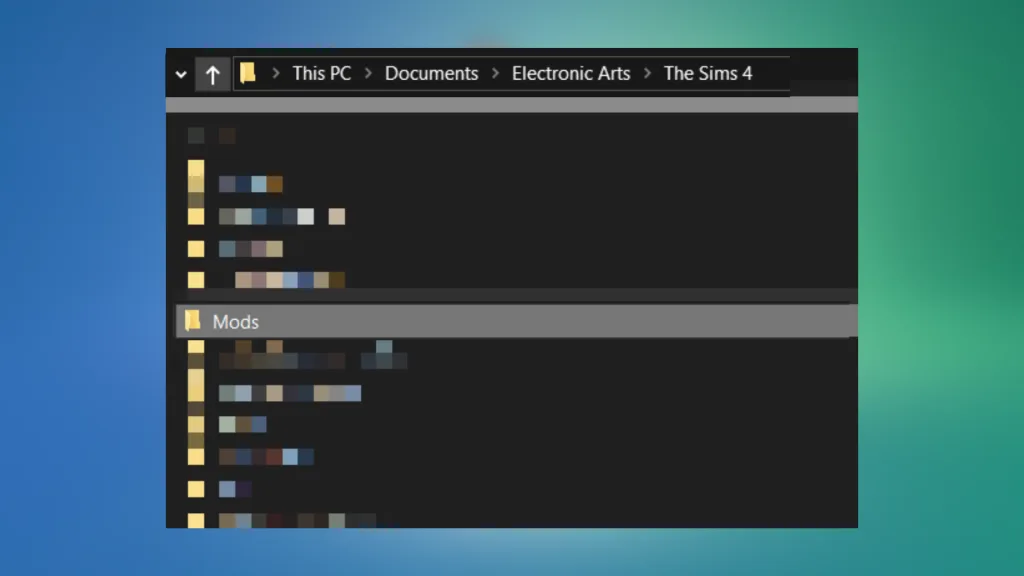
It’s really important that you change the [Your Username] part to the name of your user folder. It’s normally the first five characters of the email address associated with your Microsoft account. You can find out what it is by going to this folder:
C:\UsersAnd checking the name on the sub-folders inside.
When your files have finished extracting, you will have successfully loaded mods and custom content into your game.
How to cut and paste content into your game
If your mods or custom content aren’t in Zip files then you will need to use a slightly different method to move them around your PC. However, you will still be ultimately putting them in the same place.
Grab your content by cutting it. You can do this by right-clicking the file and selecting Cut, or by clicking the file and using Ctrl + X. Then, head to this file location:
C:\Users\[Your Username]\Documents\Electronic Arts\The Sims 4\ModsPaste the mods into the folder using Ctrl + V. Alternatively, you can paste it by right-clicking the window in File Explorer and selecting Paste.
You can also use this method if you’ve already extracted your Zipped mods to another location on your computer. Another similar way of doing this is by having both your new mod and your Mods folder open in two different windows and dragging them in. But, this is likely to copy the file, meaning you’ll have two versions of it on your computer. This takes up more space than it needs to.
How to use mods and custom content on Mac

Installing mods and custom content on Mac is a very similar process to installing them on PC. You can find your mods folder by going to this file location:
Documents/EA/The Sims 4/ModsThen, you can extract or cut and paste your new content in here using pretty much the same steps you would on PC. The only real difference is that you’ll use different keyboard shortcuts for moving files around, and a slightly different method for extracting .Zip files.
How to extract content on Mac
You’ll still have to extract content from Zip files before loading them into your Mods folder on Mac. Select the folder and use the Open With function, then select Archive Utility. This will extract the folder directly to the folder you have open.
Now that your content is unzipped, you’ll need to move it to your Mods folder. You can do this by cutting and pasting it or dragging it to the right folder.
Keyboard shortcuts for moving content on Mac
You can still cut and paste mods or custom content into your Mods folder using Mac, but this time you should use the Command (Cmd) key. Grab your content using CMD + C, then paste it into the folder using CMD + V.
How to enable mods and custom content in-game
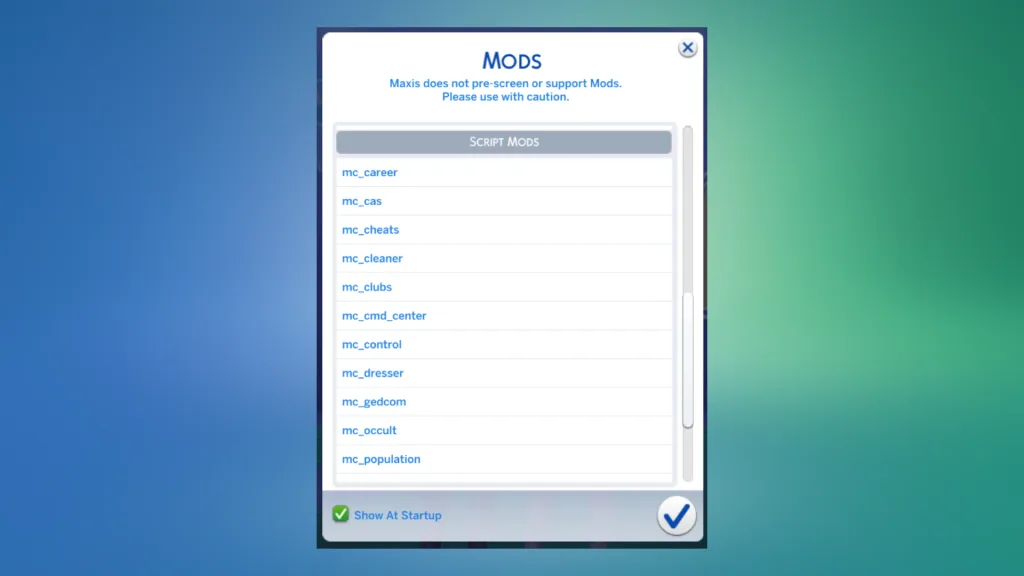
Now that you’ve loaded your files into the right place, you need to take a couple of steps in the game’s settings to get them working properly. When you boot your game up, click on the three dots in the top right of the screen. This opens up the menu. Next, select Game Options.
Navigate to the Other option in the column on the left. It’s near the bottom of the list. Then, tick the boxes next to Enable Custom Content and Mods, and Enable Script Mods. Click apply changes in the bottom-right.
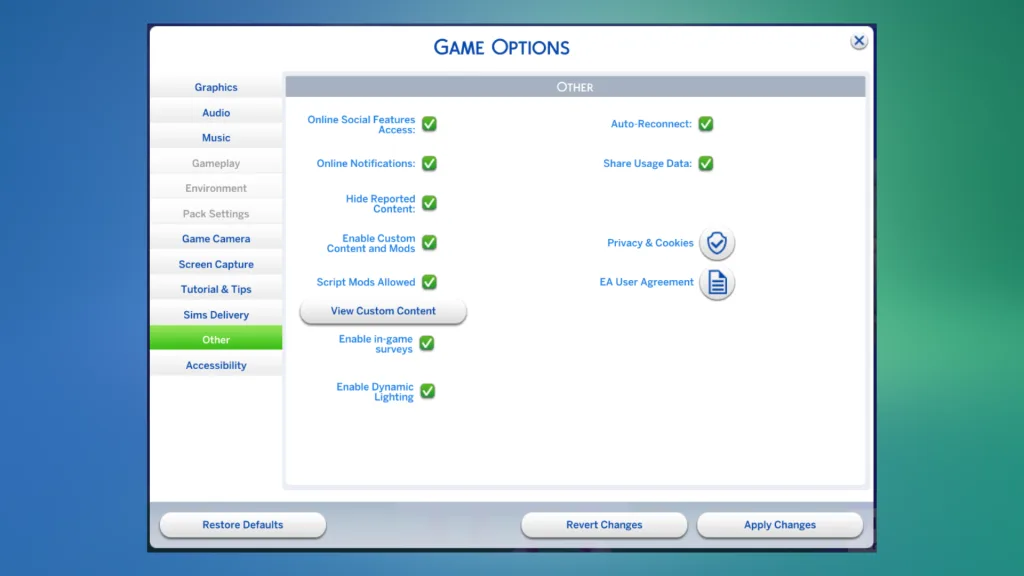
Your game will need to restart to apply these changes, but next time it starts up, your mods and custom content should be ready to go. Make sure you test your shiny new content by looking for it in Create-a-Sim, Build/Buy Mode, or wherever else it might be lurking.
How to find custom content in Create-a-Sim or Build/Buy Mode
Custom content is flagged with a little light blue banner with a spanner on it in Create-a-Sim and Build/Buy Mode. It’s where you would usually see an icon telling you which DLC the item was included with, or which event it’s associated with.
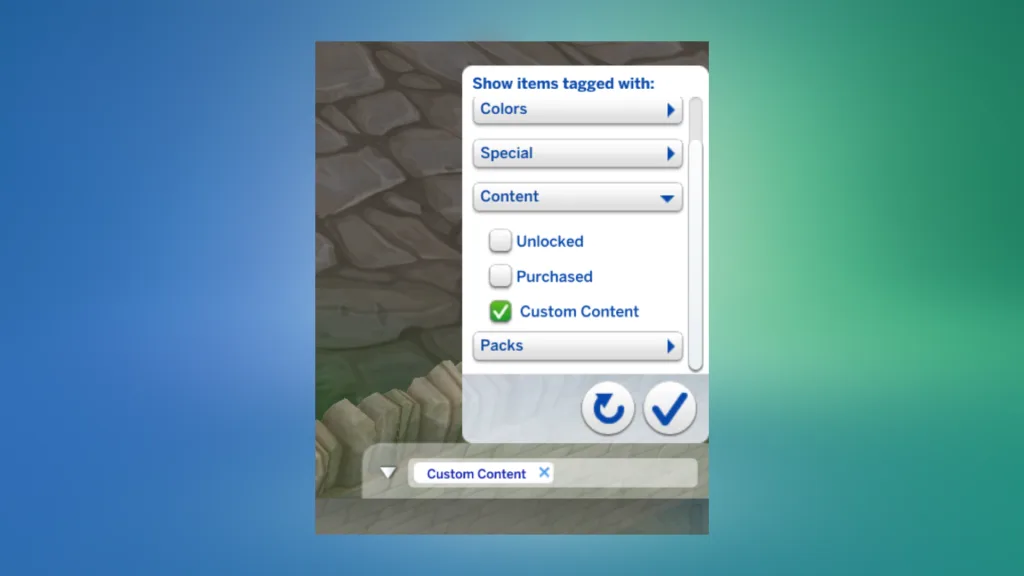
You can also filter for custom content. Pull up the filter menu – which is to the left of the items column in Create-a-Sim and in the bottom-right corner for Build/Buy Mode – and scroll until you find the Content drop-down. Open it and tick the box next to Custom Content. You’ll only be able to see custom content until you remove this filter again.